

Before you start
To get the most out of this guide, you will need to:- Either create an account in our managed instance or deploy your own hoop.dev instance
- You must be your account administrator to perform the following commands
Features
The table below outlines the features available for this type of connection.- Native - Indicates the connectivity happens through the Hoop command line (
hoop connect <connection-name>) or acessing the protocol port directly on the gateway. - One Off - This term refers to accessing the resource from Hoop Web Console.
EKS Access Setup
This guide explains how to enable access to an EKS cluster using AWS IAM roles and Kubernetes RBAC.Role X and Role Y
- Role X: the Hoop agent’s runtime identity (EC2, IRSA, or injected credentials)
- Role Y: the IAM role used only to authenticate to EKS
Step 1 — Create IAM Role Y
Create a role that represents the Kubernetes identity (Role Y). Use a clear name likearn:aws:iam::<AWS_ACCOUNT_ID>:role/eks-access-role.
Example trust policy (allow Role X to assume Role Y):
Step 2 — Allow AssumeRole (Role X -> Role Y)
Attach a policy to Role X:Step 3 — Create the EKS Access Entry
Step 4 — Create the Kubernetes ClusterRoleBinding
roleRef points to the Kubernetes role that will be granted. You can replace
cluster-admin with a least-privilege ClusterRole or use a namespace-scoped
Role and RoleBinding if you do not need cluster-wide access.
You can create multiple bindings for different groups or users. For example,
bind eks-access-role:developers to a read-only role and
eks-access-role:admins to an admin role.
The developers suffix is the session name value. It can represent a user,
group, or role binding name as long as it matches your RBAC subject.
Configure the Hoop agent to assume Role Y
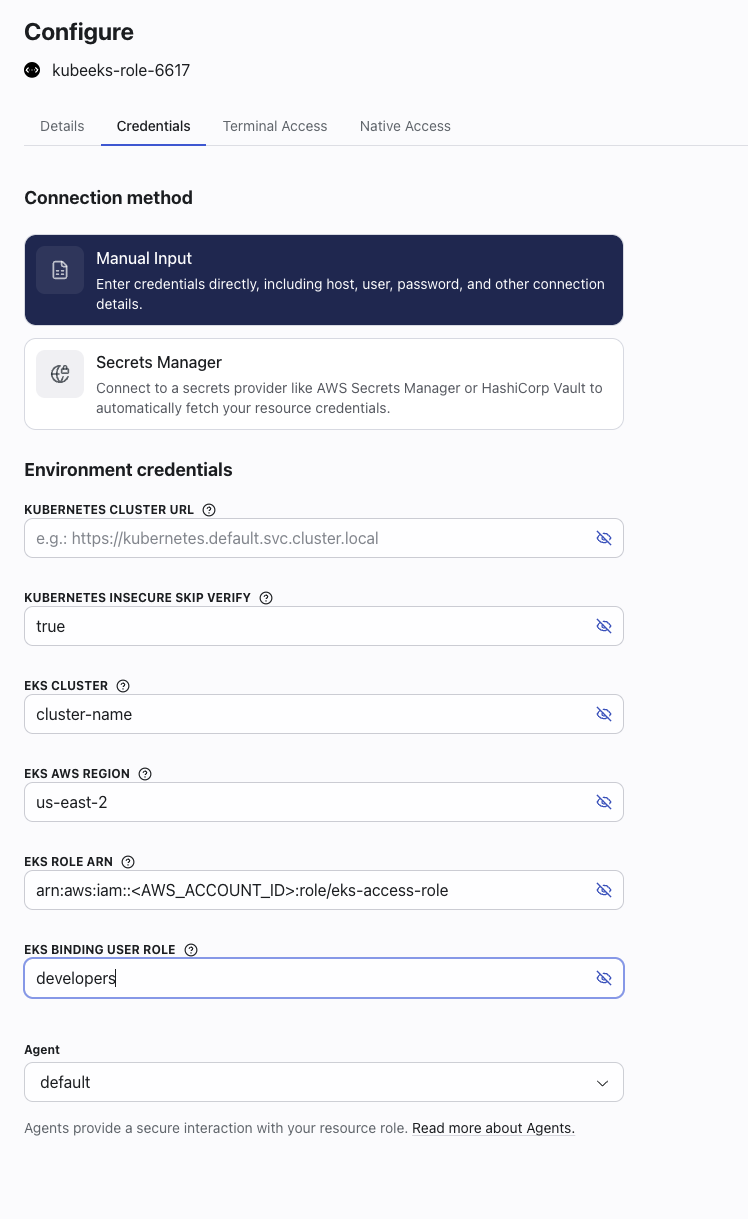
Kubernetes EKS connection and set:
EKS_ROLE_ARNtoarn:aws:iam::<AWS_ACCOUNT_ID>:role/eks-access-roleEKS_BINDING_USER_ROLEto your binding name (for exampledevelopers)